Time to clear a few makes out of my queue! I have a few unblogged makes for probably the first time ever!
As you all know, or at least read during this year’s #sewphotohop, I am most definitely a separates girl. Now I don’t mean to alarm anyone, but I made a dress! I’m not sure what came over me back in July but I decided I really wanted to make the Adelaide dress from Seamwork. I was worried it wouldn’t suit me as I am a bit chunkier round the middle than I’d like as well as being quite pear-shaped but I figured I could knock it up in some cheap fabric and decide when it was on.
I got the pattern back in July and made my usual adjustments (FBA, grading out a couple of sizes at the hip, sloping shoulders and a sway back) and cut straight into my fabric instead of muslinning (not a word) it. I’d picked up some cheap viscose from my local market – an irregular polka dot for just £3 p/m (this is probably a slightly nicer alternative!). The pattern actually suggests more stable wovens like chambray or linen, but I wanted something that was a bit swishier to help avoid bulk in the waist and lower body.
I accidentally cut the back piece as 2 pieces instead of on the fold so it’s slightly narrower across the back to accommodate the seam allowance but the extra seam is barely noticeable in the dotty print. Construction was easy peasy though – the pattern had good clear instructions and diagrams to follow but it did take me a bit longer to put together than Seamwork’s 3 hour proposed assembly time. I’ve seen lots of other sewists who’ve stated 3 hours for a Seamwork make isn’t really realistic, but I would still consider this a quick sew as it can be put together in an afternoon with enough time left over for tea and biscuit breaks!
The only time I deviated from the pattern when doing the button holes. The pattern calls for snaps but I didn’t really fancy having a Superman moment and popping out of my frock so I opted for slightly more secure buttons instead. I pinned the button stands together just to get an idea of how it would look when worn and the fit was loose enough to pull on over my head without having to undo any pins, so instead of sewing and cutting lots of buttonholes I took a shortcut. I sewed all of the buttonholes, but I left them uncut and
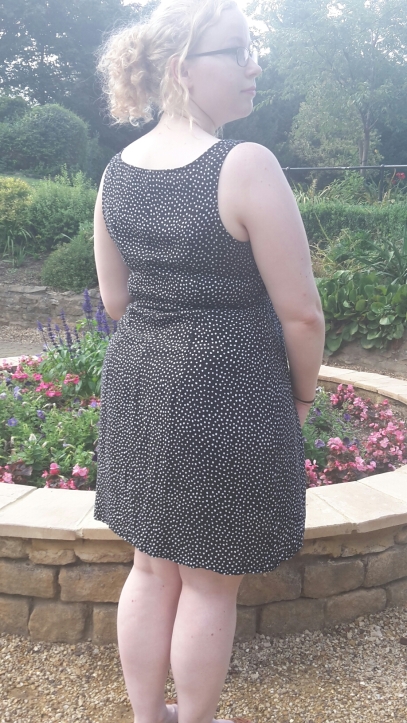
Unclear if the weird bit at the waist is excess fabric, a badly fitting bra or just back flab LOL *cries*
sewed the buttons onto the wrong side of the dress, over the uncut buttonholes to make it look like they had been done up normally. The buttonholes are still there so if I change my mind and want to have a proper button front dress, I can just take the buttons off, slice the button holes and stitch the buttons back onto the right side (which is on the left… confusing…). A lazy sewists shortcut, but it does not change the look of the dress at all so I’ll be doing it again!!
I made this as a wearable muslin – I don’t normally do that as I normally have so many fitting issues and keep making complicated projects like coats but as the fabric was cheap and cheerful I dived straight in and hoped for the best. As it turns out, I feel great in it and even though it’s just a test version, I wear it to work weekly! It’s comfortable, flattering over my curves and also easy to dress up or down. I see a few more Adelaides in my future!

nice make. It really flatters you and I like your trick with the buttons!
LikeLiked by 1 person
Thanks! It’s quite lazy but it’s a time saver!
LikeLike
What a lovely fabric. It suits you well. I sometimes add a seam in the back piece to give a dress or jacket more fit. What I wanted to say: You can give it a good use as well.
LikeLiked by 1 person
Super dress, it looks great on you.
LikeLiked by 1 person
Very cute! Nice choice of fabric and pattern. It looks great on you!
LikeLiked by 1 person
Pretty dress! I like wearable muslins – I bought fabric from a market to make a wearable muslin coat & liked it so much it became “the coat”.
LikeLiked by 1 person
Ooh I’m glad you went for a lighter weight viscose – it looks amaze! I’ve been trying to find denims and chambray to make mine but I reckon I’ll trial viscose now – thanks
LikeLike
Cute dress. It looks good on you! I always go for a wearable muslin if I can. Thrift store fabric is cheaper than muslin yardage I’ve found!
LikeLike